This post was originally published on the
XLAB Steampunk blog.
Upgrading Ansible Playbooks and roles to the latest Ansible version can be quite a challenge, as a lot can change between versions (best practices alter, parameters and modules are moved or renamed, attributes are deprecated) … and the most challenging of all: you need to figure out what you were trying to accomplish with the playbook you wrote all those years ago. Or worse - you weren’t even the one who wrote it in the first place. And now you need to decide how to maintain the effect but upgrade the code.
Things that were excellently written years ago have now become errors. And if you’re upgrading from older versions when Ansible Collections weren’t even a thing, you’re in for some heavy lifting, if you approach this process manually. But luckily you don’t have to. While Ansible upgrades are a thing you can’t avoid forever, they don’t have to be as daunting as they seem at first glance. Not when you have tools to make the job much easier for you.
In this blog post, we take you through the process of upgrading your playbooks from Ansible 2.4 to Ansible 2.14 step by step and we show you how using Ansible Lint and Steampunk Spotter, the upgrade process can take minutes instead of hours, and helps you be confident you didn’t miss anything that could lead to issues ranging from small errors to serious security hazards.
Let’s dive in!
1. Choose powerful tools
We will be upgrading an Ansible Playbook and roles from Ansible 2.4 to Ansible 2.14, which is a big leap since that’s five years of dependency changes between versions.
We’ll use two tools that are essential for writing, maintaining, and updating Ansible Playbooks. We’ll use Ansible Lint, as this is THE tool for checking errors, bugs, and styling errors in Ansible content.
And we’ll use Steampunk Spotter, which also analyzes playbooks but goes beyond syntax checking and is particularly useful for simplifying and speeding up Ansible upgrades, as it:
- identifies all the issues you need to resolve when upgrading to a new Ansible version,
- fixes the issues it can for you automatically,
- helps you save time with convenience features such as generating a requirements file or by pointing you to the module documentation of a specific version.
You’ll see this in action later, and you’ll also see how using Ansible Lint and Steampunk Spotter together helps you achieve maximum results.
2. Start with linting
When upgrading to 2.14, we use an environment with Ansible (Core) 2.14 installed, and the latest versions of tools to go with it.
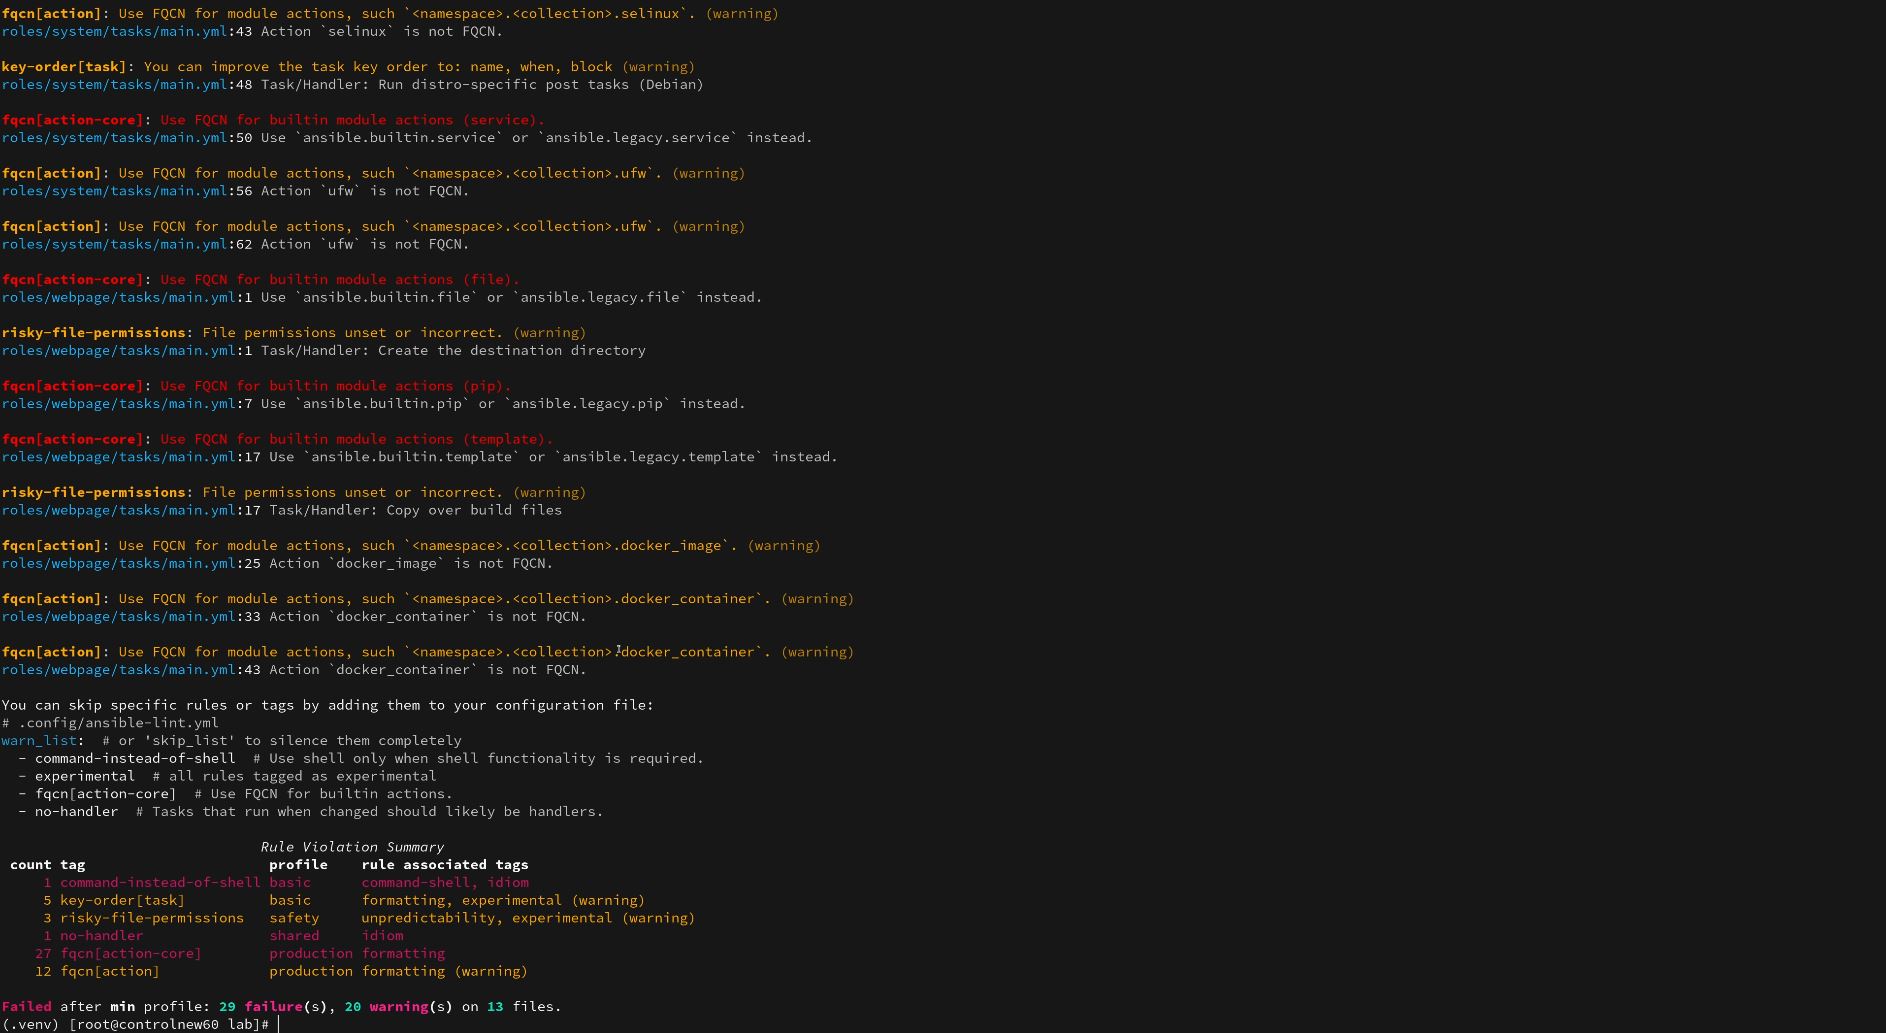
First, we always run ansible-lint to see what errors it finds before even running Ansible.


In our case, it shows us that we need to make a lot of fixes. However, most of the found issues actually relate to the same problem - we need to use fully qualified collection names (FQCN) as in 2.4, collections didn’t exist yet.
So, what do we do, do we fix them one by one? Well, we could do that, but we don’t actually know which collections they are in, so that would involve a lot of browsing. That’s “suboptimal, very suboptimal,” as our Ansible expert Sašo would say ;) So what is the alternative? We let Steampunk Spotter fix this for us. We just fix other minor linter issues that Ansible Lint has found, and then run Spotter.
3. Do a little spotting (a lot, actually)
Now it’s Spotter’s time to shine. We’re going to use it extensively so we can take advantage of everything it has to offer and get all the help we can get with the upgrade.
Do a general scan
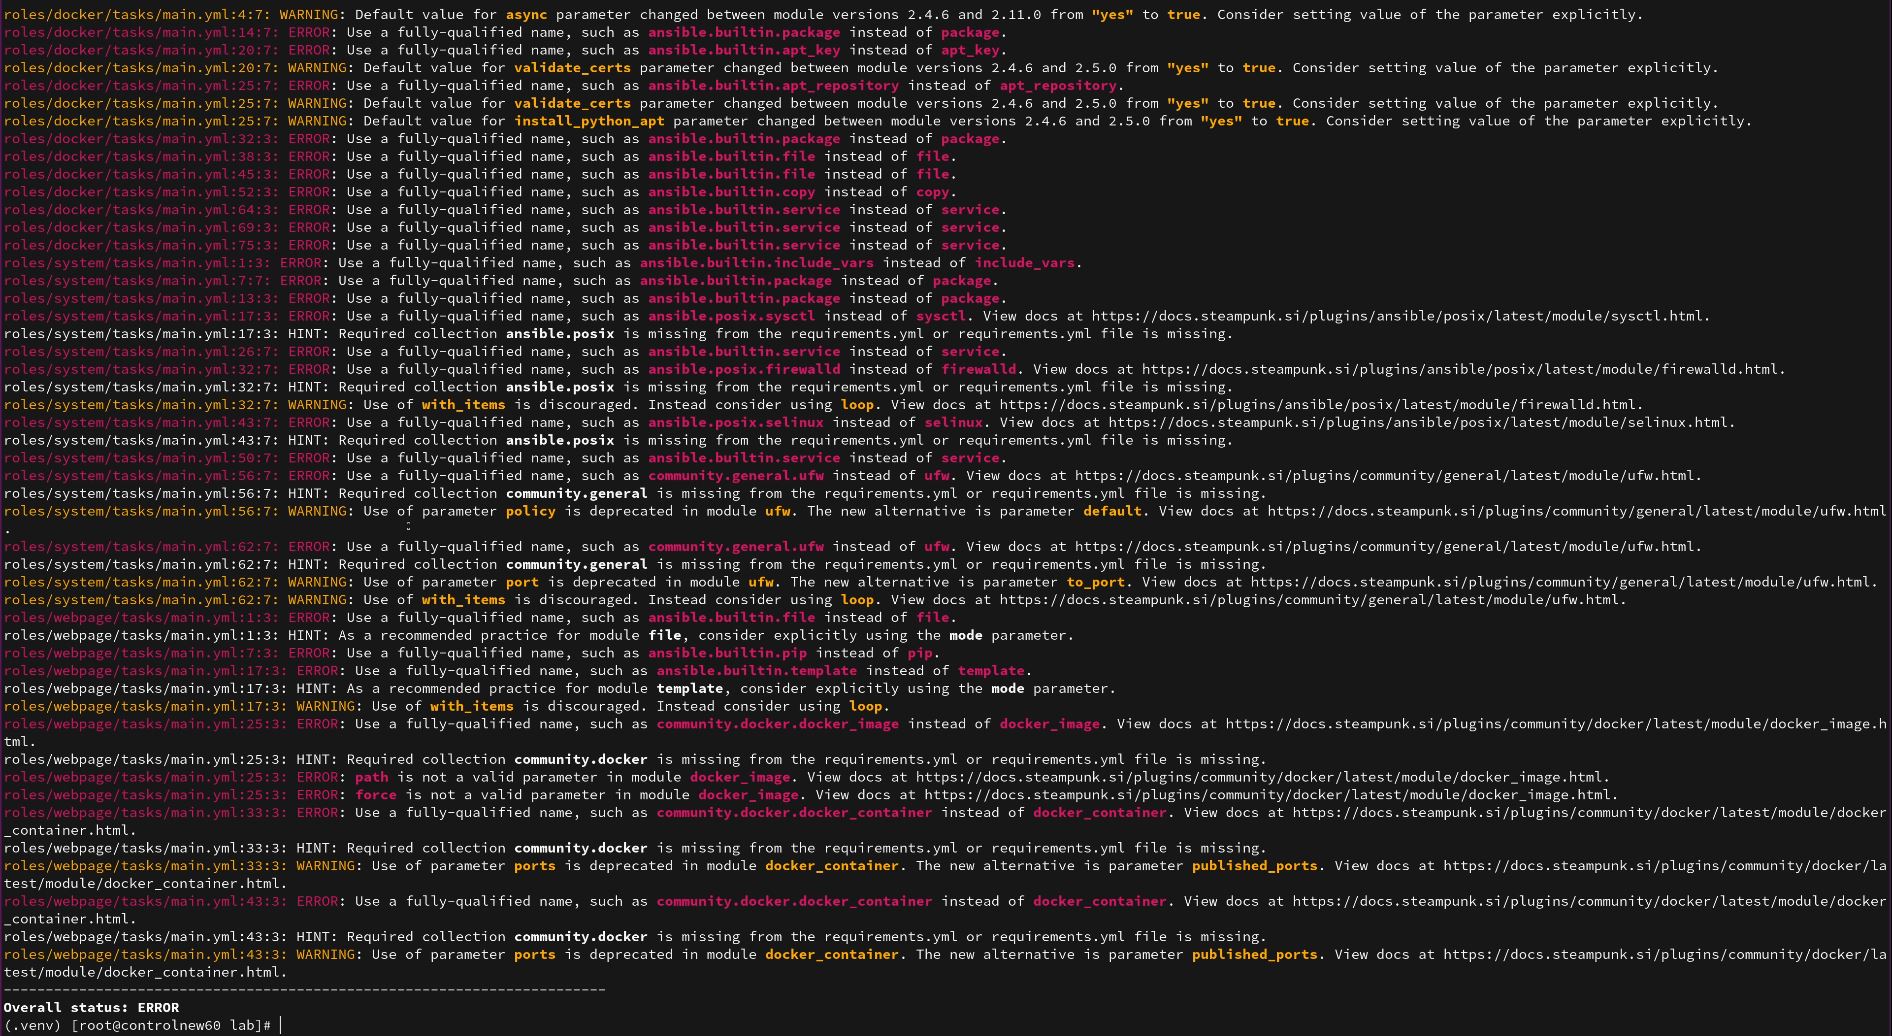
Run Spotter to see what compatibility issues it finds. To do this, we need to specify the Ansible version we want to upgrade to. In our case, that’s 2.14, so we run spotter scan -o ansible_version=2.14 . We get quite a few errors, but again, most are related to the use of FQCNs.


A great thing about Spotter is the fact that it can automatically fix some of the problems it finds. It may not be able to fix all of them, since some require you to explicitly decide what you want to do, but for the problems where such a decision is not required, it fixes them immediately. You simply add the optional –rewrite argument to the command.
Scan with automatic rewrite function
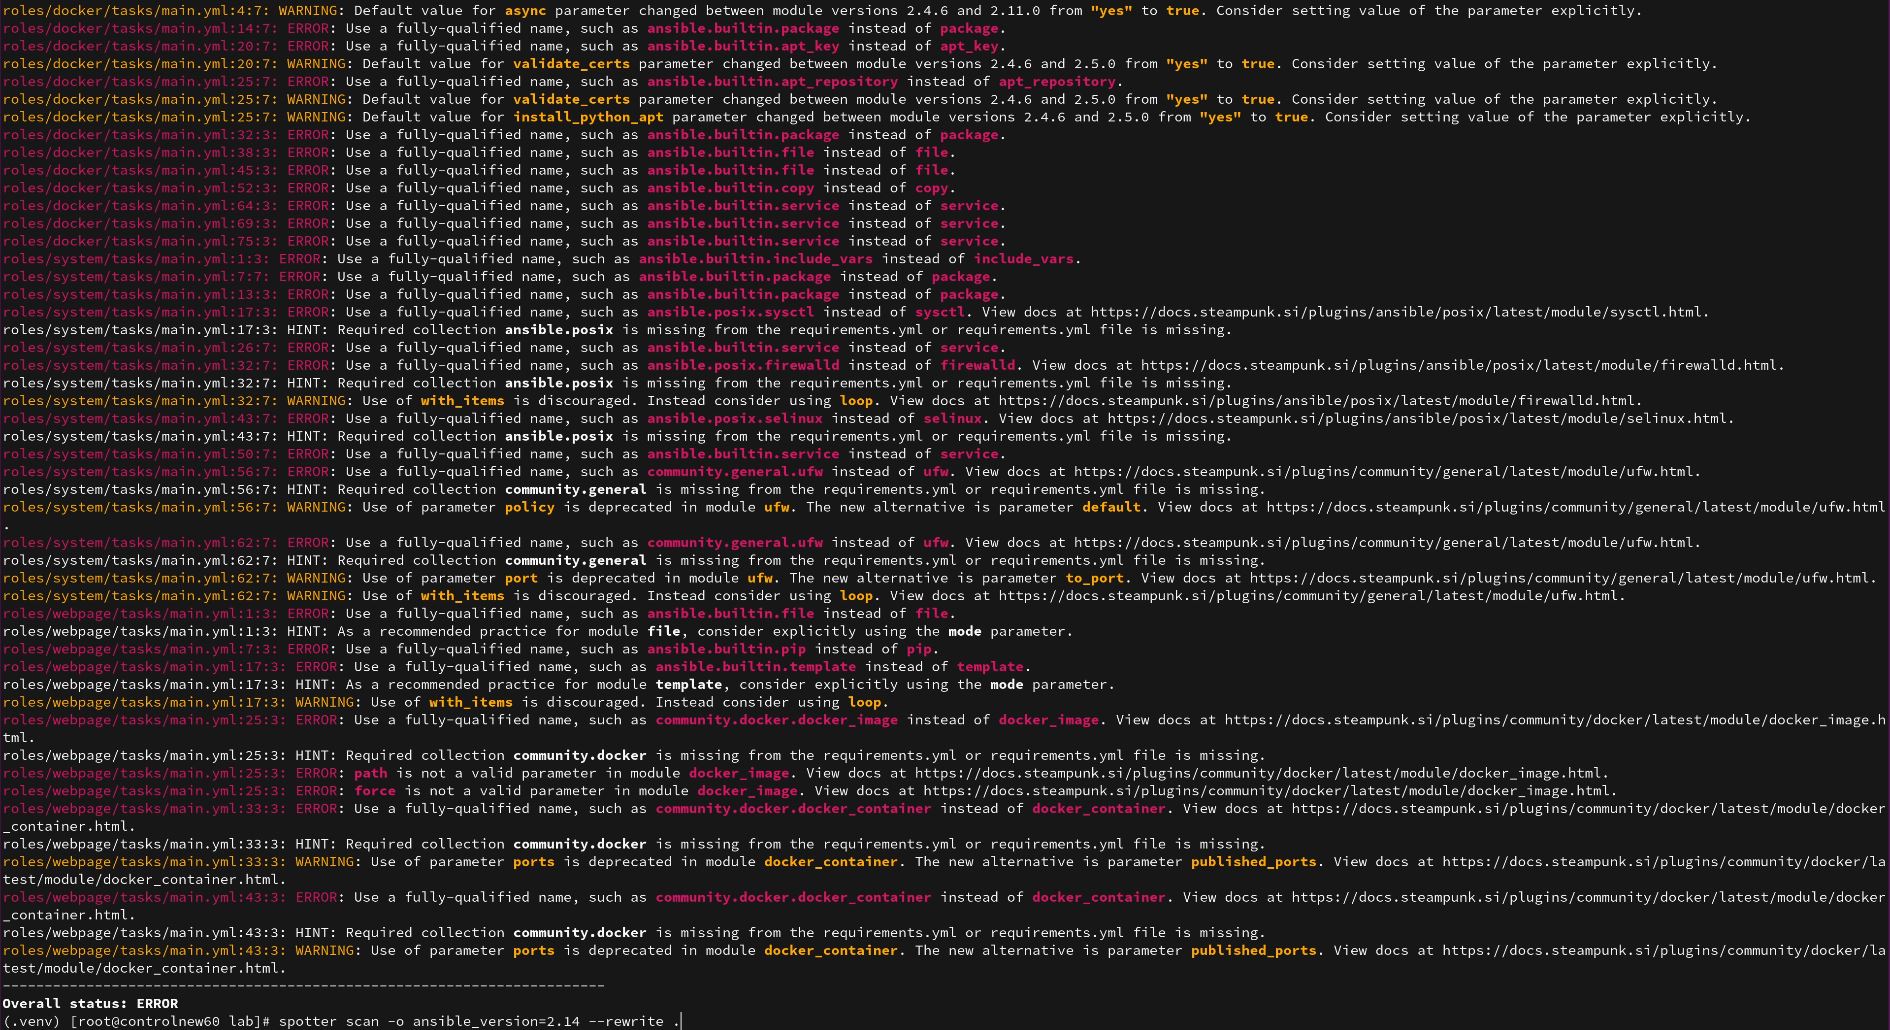
So, we run Spotter again, and this time we turn on the rewrite flag spotter scan -o ansible_version=2.14 --rewrite . and Spotter will magically fix FQCN-related issues for you.


Run Spotter again
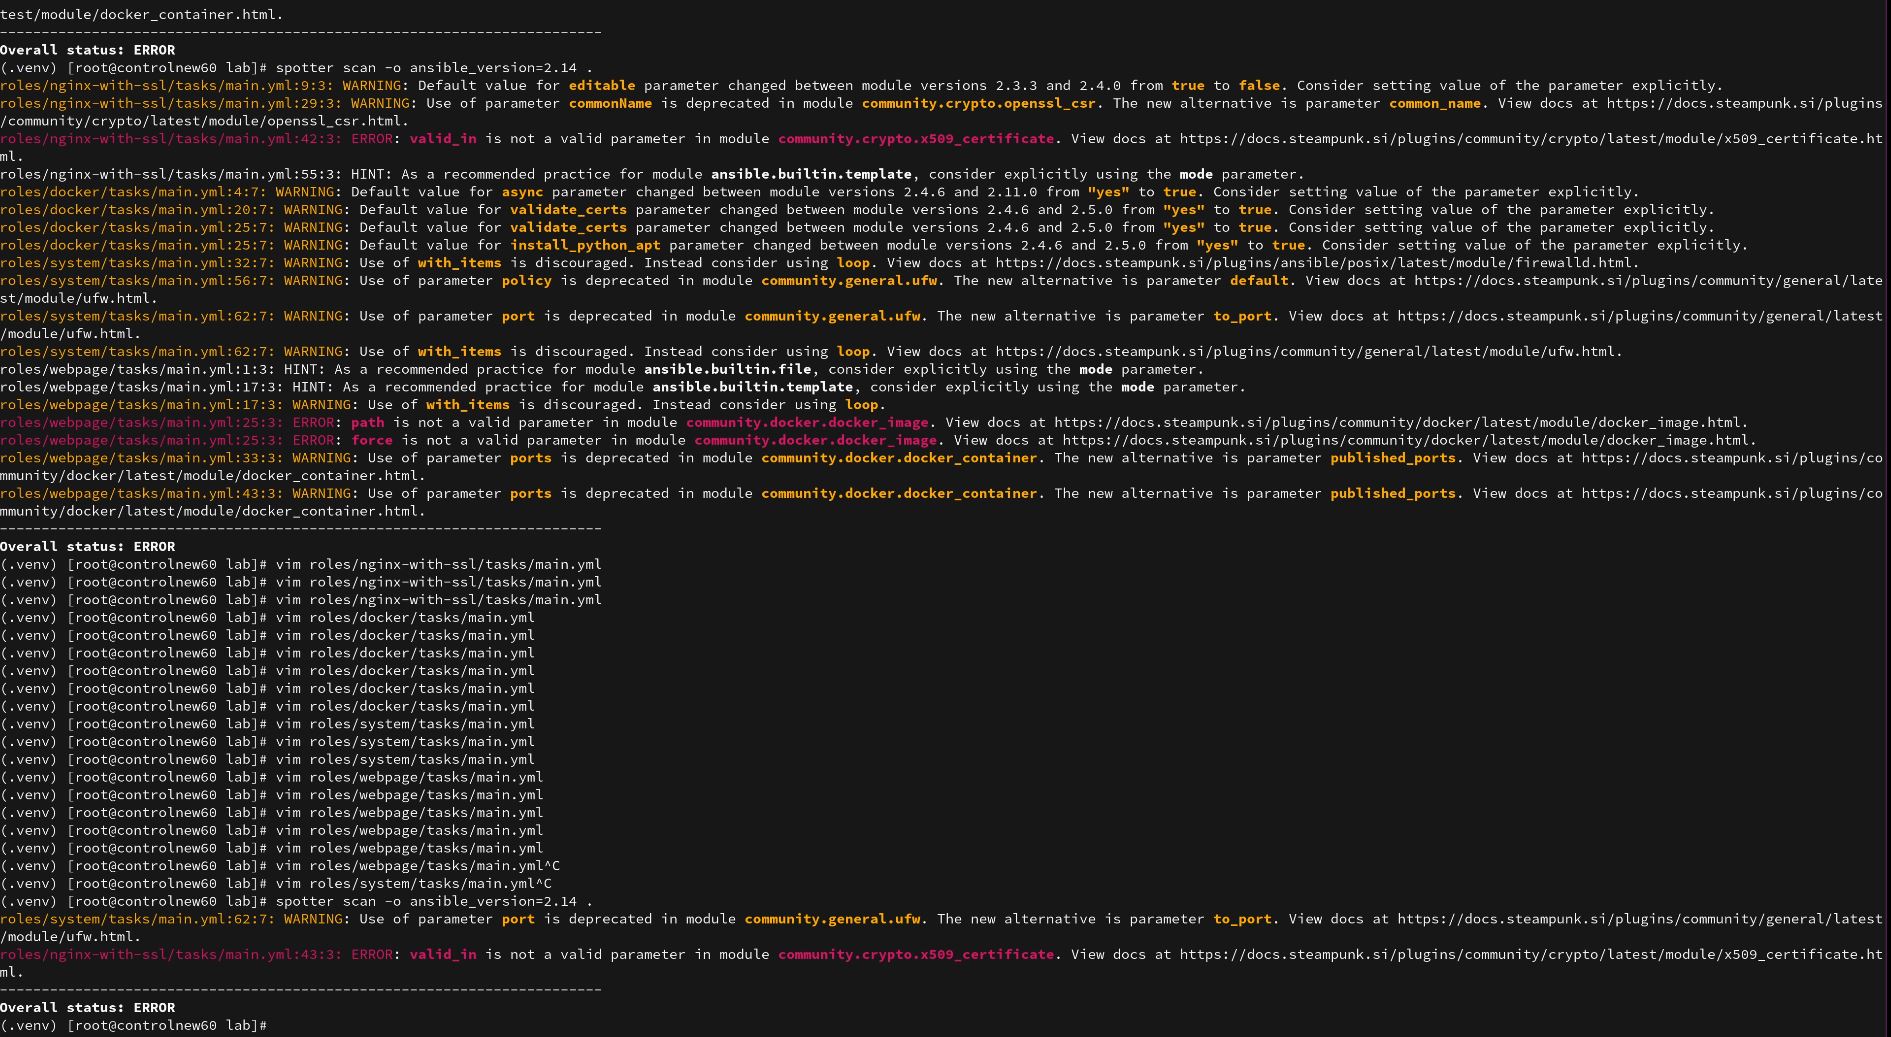
After that, we run Spotter again. There are much fewer errors now that we have fixed all FCQNs related ones.
However, there are still some other issues. These are the ones that Spotter could not fix with the rewrite function because they are not among the things that a tool can do for you 100% reliably. We have to decide specifically what to do for each error, hint or warning.
Some errors are minor fixes, like parameters being renamed or restructured. They do not take much time. Others are still simple, but require a decision to be made. For example: if a default value of a parameter changes, is the new default still what you want? If you did not specify a value explicitly before, Spotter now prompts you to decide on the desired behaviour as part of the upgrade.
But some errors require a little more work. For example, we encountered this error when scanning our playbook: path and force are not valid parameters in the community.docker.docker_image module.
What we have to do now is figure out what the valid parameters are in the latest version of the module. So how do you do that? Spending lots of time browsing again? This is another example of how Spotter helps you save time. It already provides you with the link to the documentation, where you can find all the information you need to fix this error. There, we can see that the module parameters have been fundamentally restructured, but without and changes to how they function.
Find out how much time you can actually save if you use Steampunk Spotter for Ansible upgrade compared to doing it manually.
Like that, we go through all these errors, and fix them.
Another thing you might notice is that when running with –rewrite, Spotter generated a requirements.yml file for you automatically, based on the latest versions of the collections the modules are located in.
Run Spotter again, again
After automatically fixing FQCNs and manually fixing remaining mistakes, it’s time to run spotter scan -o ansible_version=2.14 once again, to catch any potential errors that may have remained.


In our case, Spotter has found two remaining issues. We forgot to fix an error and instead skipped over an error line. Oops. You see, it’s good to run these tools several times to really spot things we may have missed.
The remaining mistake (valid_in is not a valid parameter in module community.crypto.x509_certificate) is the hardest part of our upgrade. The module used to be called openssl_certificate. It was then moved into a collection and subsequently renamed. There are two migrations, and it becomes really hard to parse them because if you search for openssl_certificate, you will not find the new module. This is where Spotter really helps you out. It keeps track of all the migrations the module has gone through between collections and renames and does everything for you by generating a requirements file, rewriting to the current newest FQCN and pointing you to the correct documentation page.
There is another issue in our demo that we have yet to solve, but since this is a very complicated upgrade, it’s difficult to show how it’s done in a blog post. But don’t worry, in this free webinar, where we go over everything shown in this post and more, you can see how it’s done step by step.
Run checks one last time
To make sure you have done everything necessary for a successful upgrade, run Spotter one last time after you have fixed the remaining problems. If Spotter finds no errors, you are done with the upgrade. If not, just fix the remaining issues and repeat the process. Finally, run Ansible Lint once again to fix any remaining linter issues, and you’re done.
Well, almost, there is just one thing left to do.
Install Ansible Collections with the automatically generated requirements file
Now that you have fixed the remaining issues, you have one more thing to do: Install Ansible Collections. Otherwise, you will not have the content to run your playbooks and roles. As mentioned earlier, Spotter has generated a requirements file, which again comes very handy because now all we have to do is run ansible-galaxy collection install -r requirements.yml and wait for collections to be installed.
4. The grand finale: run your playbook
Then we run the playbook again (in check mode first!), and if everything works (and it should now), the upgrade is complete.
That’s it! Waay faster than figuring out the checks and fixes yourself, right? For a rough idea, our team did some testing. They took this playbook and fixed everything manually, which took 2 hours (and remember they knew exactly where to look for the documentation they needed, otherwise it would have taken even longer), but with Lint and Spotter it took 20 minutes!
As mentioned earlier, it’s difficult to show all the steps we took to upgrade this playbook in one blog post. Therefore, we have also created a detailed video walkthrough of this upgrade. In this free webinar, we walk you through the entire process step by step.


