This post was originally published on the
XLAB Steampunk blog.
So, you decided to write your first Ansible Playbook. Maybe not even your first, maybe you just want to know how to write secure and reliable ones. Splendid, you came to the right place. This blog is a simple guide to help you get started or improve on your playbook writing journey.
What can you do with Ansible Playbooks?
The whole point of writing playbooks is to automate those pesky tedious manual tasks. In general, automation usually applies to larger systems of IT infrastructure, so we assume you would like to create a reusable configuration management and multi machine deployment system. This system should be simple, yet capable of deploying complex applications easily. High quality Ansible Collections can help you establish this robust automation workflow, but their content needs to be then applied appropriately, to achieve the key needed ingredient of great automation, which is their reliability.
What does a reliable Ansible Playbook mean?
If the Ansible Playbook that implements task steps is not reliable, we gained nothing. Before, we had to perform error-prone steps manually, and now we have to overview Ansible executions. Only a reliable playbook can achieve trustable automation, meaning that it will do exactly what you expect every time you run it. Enforcing the desired state is what has the most significant impact on the robustness of your Ansible Playbooks. That is how you can be sure you have a reliable playbook.
Ansible Playbook structure:
A playbook is a simple and efficient way to automate complex IT tasks, such as the deployment of applications and the orchestration of infrastructure. A typical playbook template consists of the following elements:
- Hosts: A list of one or more hosts on which the playbook will run.
- Tasks: A list of actions that will be performed on the specified hosts. Tasks can include commands, modules, or plays.
- Variables: A section where you can define variables that can be used in the playbook.
- Handlers: A section that lists tasks that are only executed if notified by another task.
- Plays: A collection of tasks that are executed in a specific order.
Ansible Playbook template:
A template is a file that contains all your configuration parameters. In the Ansible, dynamic values are given as variables, and during playbook execution, the variables will be replaced with the relevant values.
Here is a basic Ansible Playbook template:
---
- name: Sample Playbook
  hosts: <hosts list>

  tasks:
    - name: <task name>
    <module>:
      <module options>

  handlers:
    - name: <handler name>
     <module>:
       <module options>

  vars:
    <variable name>: <variable value>
Check out our Ultimate guide for writing high-quality Ansible Playbooks
How to make sure your Ansible Playbook is secure and reliable?
Well, the good news is that you don’t have to tackle the challenge all alone. Lucky for us, we have amazing Ansible scanning tools available to help us out, such as Ansible Lint and Steampunk Spotter. You have probably heard of Ansible Lint, which helps you follow Ansible’s best practices, and covers the basics when it comes to making sure your playbooks are written well. Spotter goes beyond styling errors and syntax checking. It ventures into the Ansible content itself, the modules, roles, and collections, and gives suggestions that are specific to a particular module and user environment setup.
But even when using the tools, it’s good to know where to get started:
1. Use fully qualified names (FQCNs)
All Ansible modules lived in the same global namespace before the introduction of Ansible Collections. Ansible Base introduced the routing table for content in order not to break existing Ansible Playbooks. Ansible developers then moved the content from the central repository into dedicated collections. Existing Ansible Playbooks didn’t have to be updated, new playbooks, however, should always use FQCNs. This applies when you use Ansible versions 2.10 or higher.
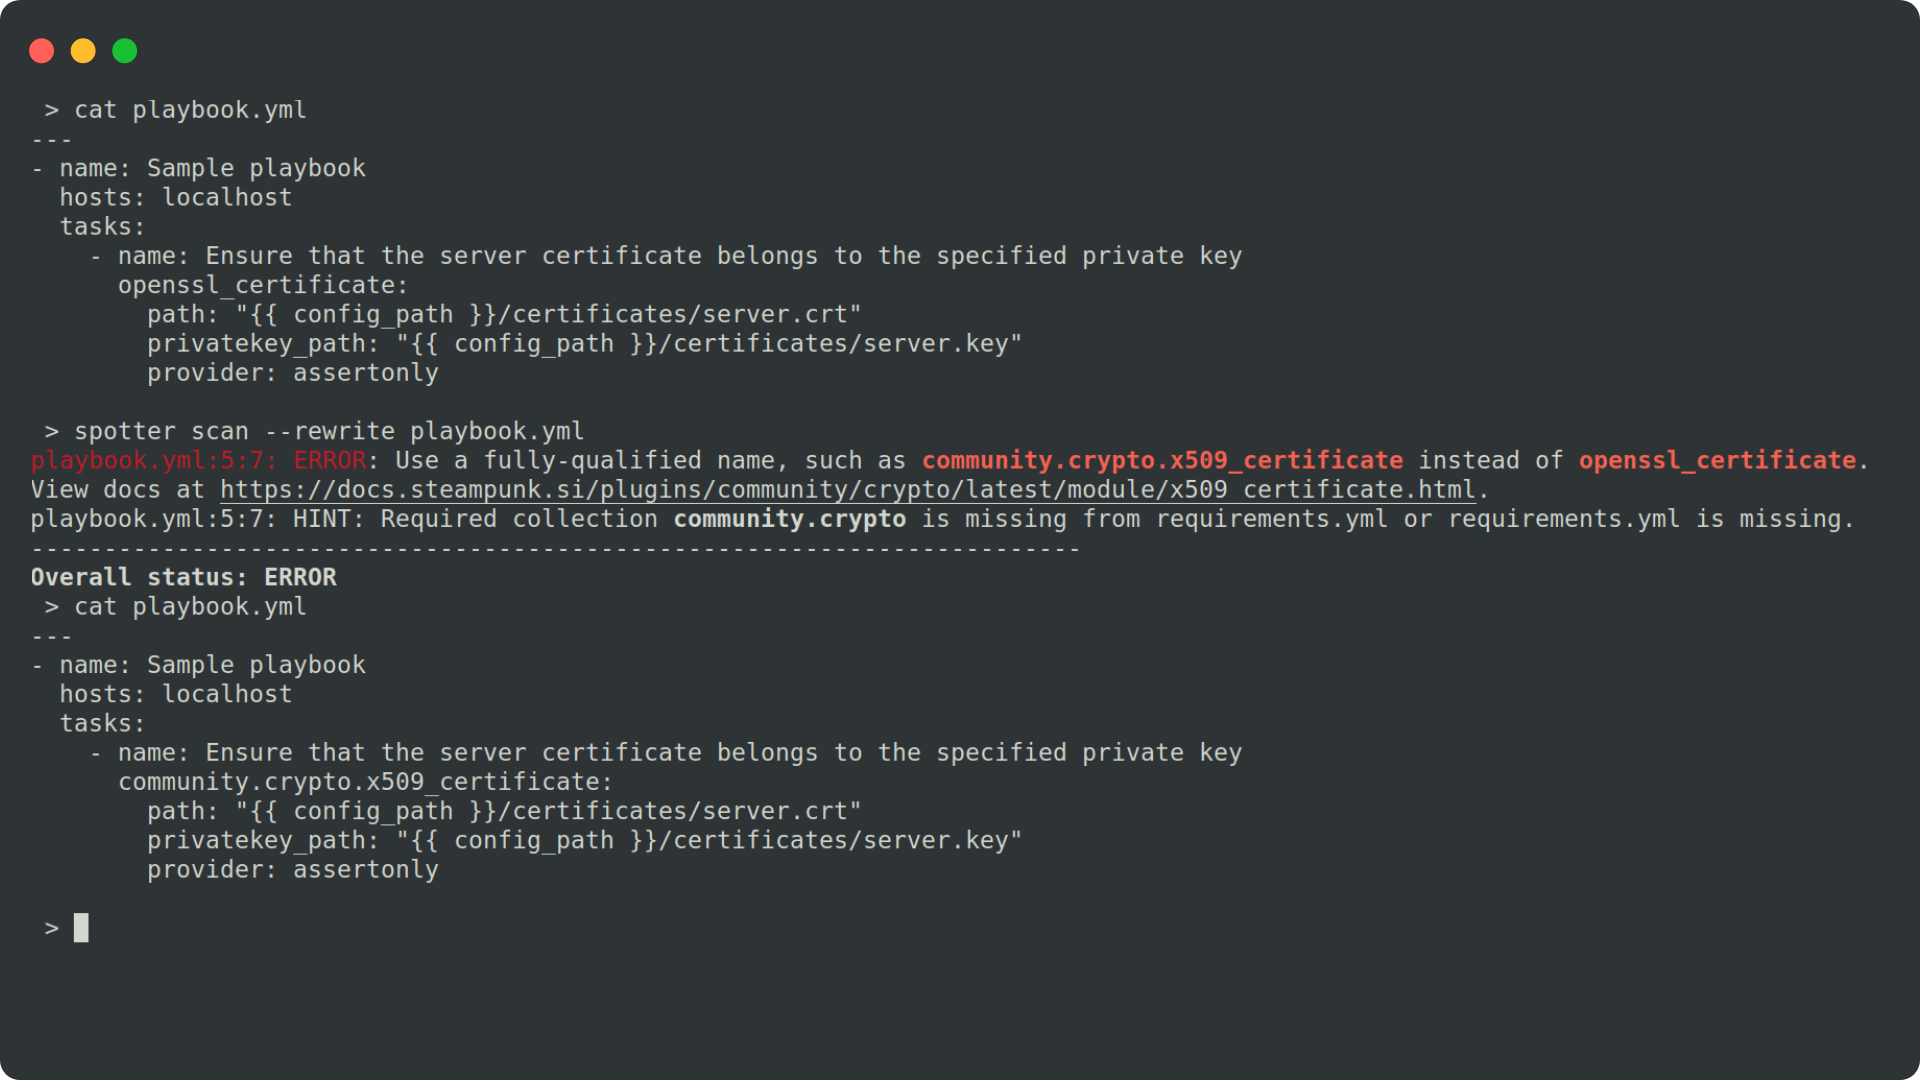
If we use FQCNs, there is less chance that Ansible will use a different module than intended. To add FQCNs, Steampunk Spotter, a tool that analyzes and provides recommendations for your playbooks, can come in handy. Spotter’s rewrite function can do this absolutely automatically! It also creates a requirements.yml file while rewriting the playbook, which can greatly assist you starting out as well. You can read more about what Spotter can do, here.
Let’s take a look how to add FQCNs with Spotter:
2. Organize and document
Thorough documentation is a must. It enables others that view the content after you, to know exactly what you were trying to achieve with your playbook. Structure is also important; you should always follow the structure described in Ansible documentation. If you are only automating your infrastructure, you should also try and organize your playbooks into logical groups. If they are too large, split them into multiple files and proceed from there. When automating a complex application, consider grouping your content into roles.
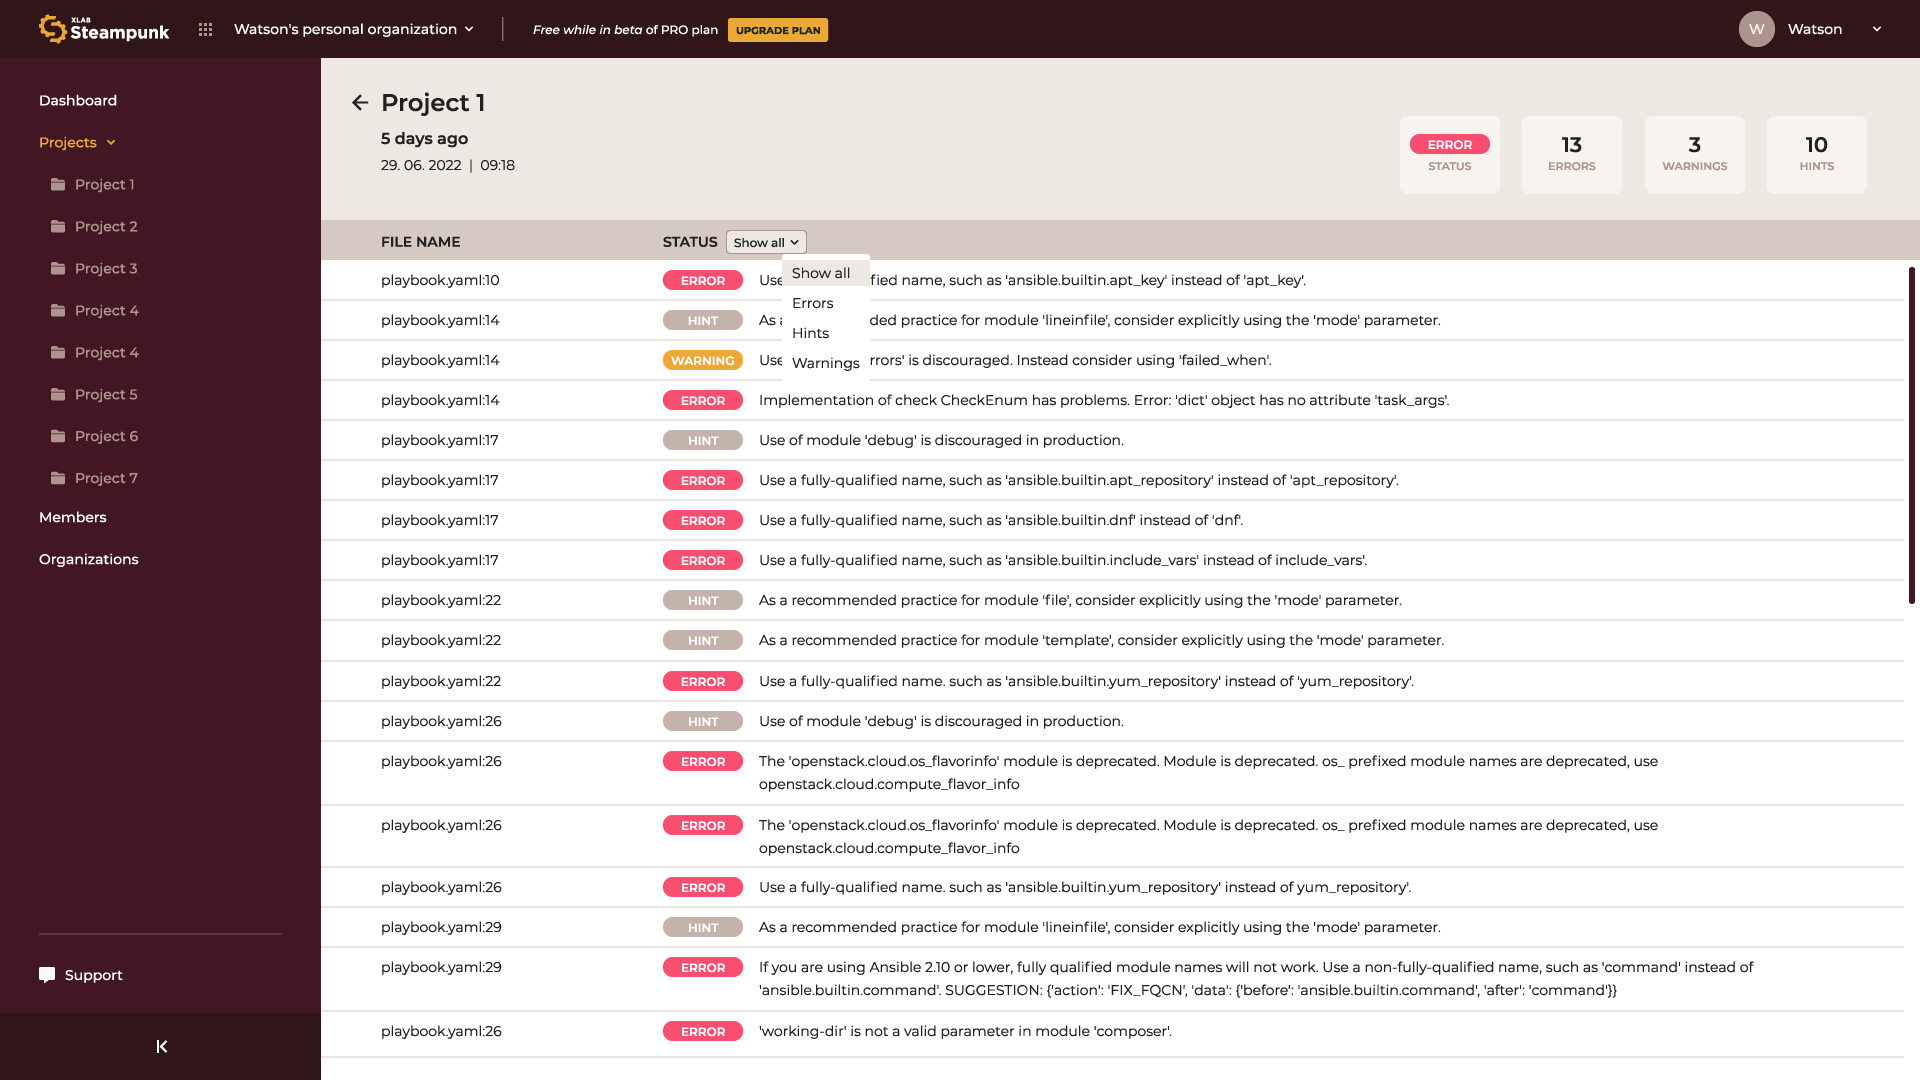
Saving your Ansible content in a Git repository is probably the easiest way of storing your content and tracking your changes. If you would like to check the quality of public repositories and make sure your playbooks are secure, reliable, and up-to-date, Spotter can also help you with that. It has a convenient app that allows you to overview playbook scan data, which can help you develop your playbook writing skills and keep track of your progress.
Here’s how you can scan your git repository with the Spotter app:
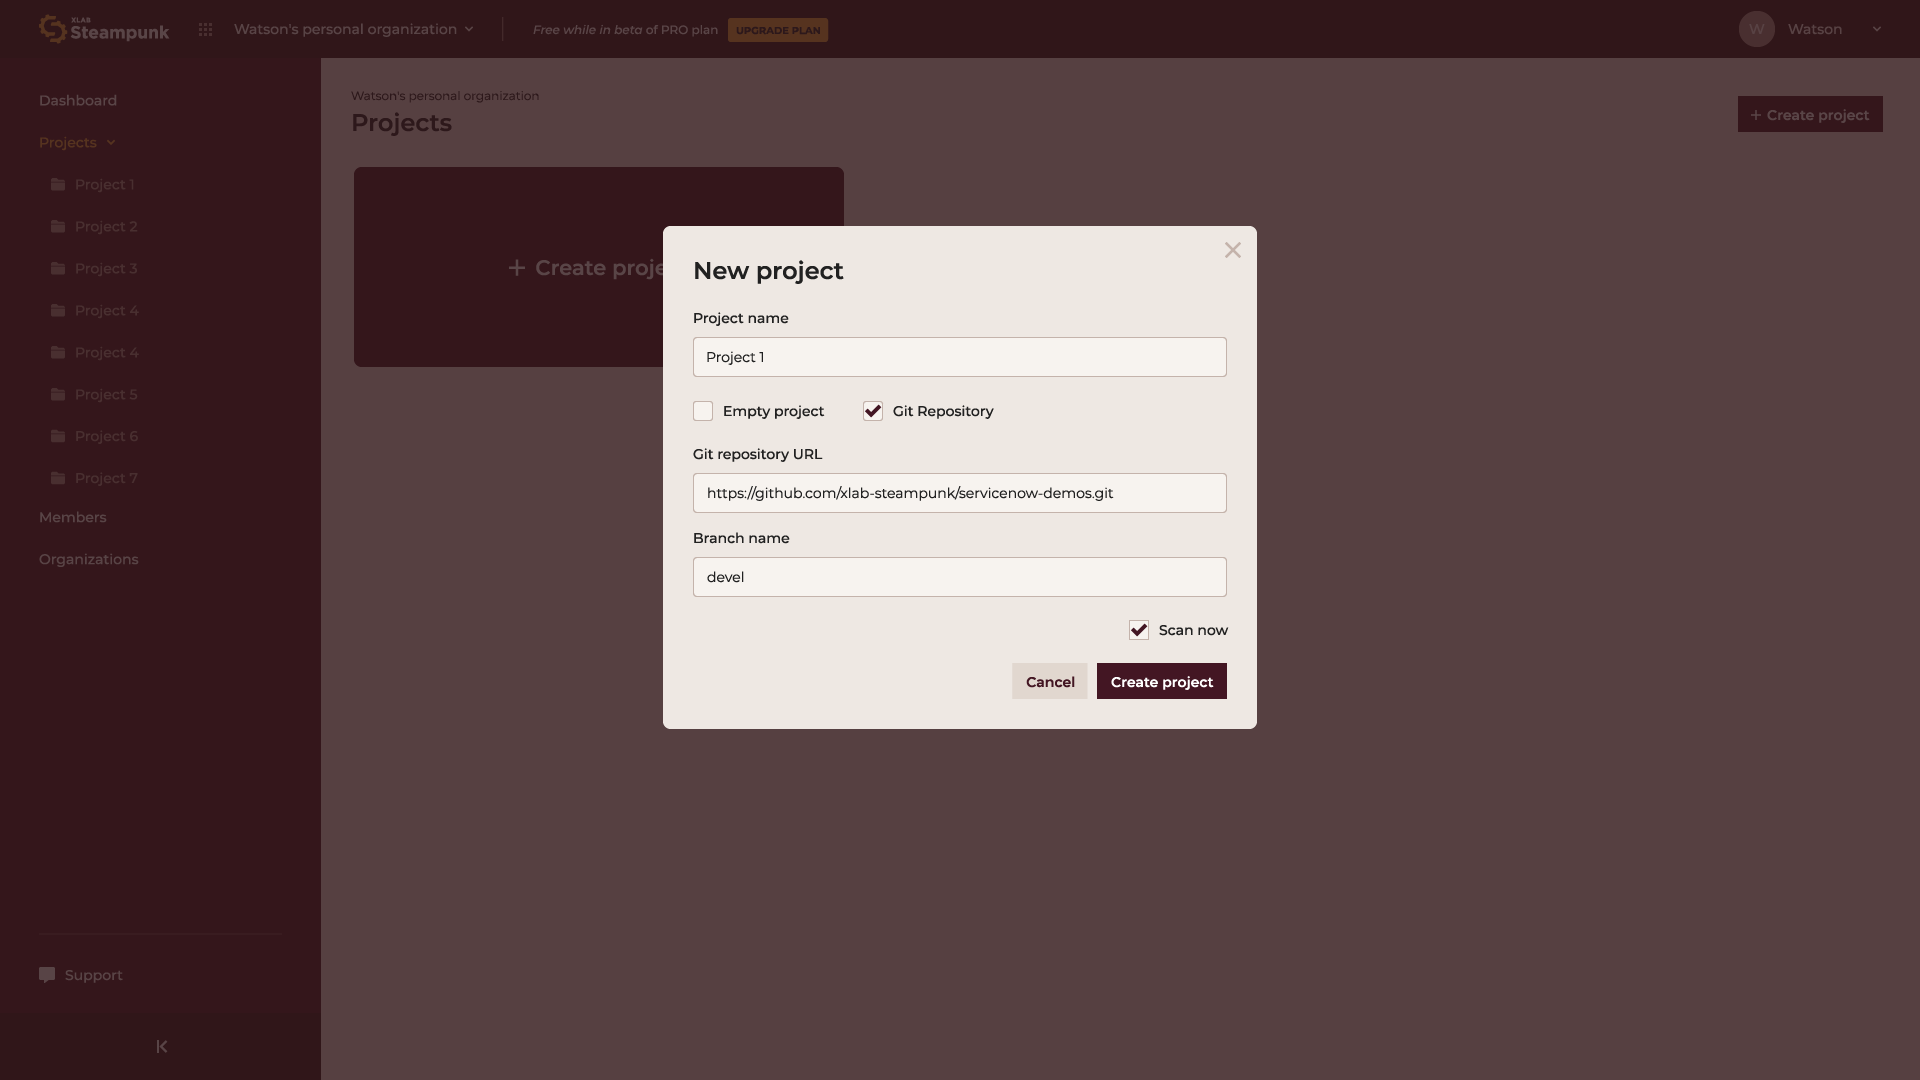
After scanning, the tool provides you with information on errors, hints, and warnings hidden in your playbooks, directing you to all the required module documentation, and more. Why would you waste time searching for information if Spotter can provide it for you, helping you stay organized and learn playbook writing much faster? You can also use it as a CLI tool or integrated with CI/CD pipelines (GitHub, GitLab), and within the VS Code.
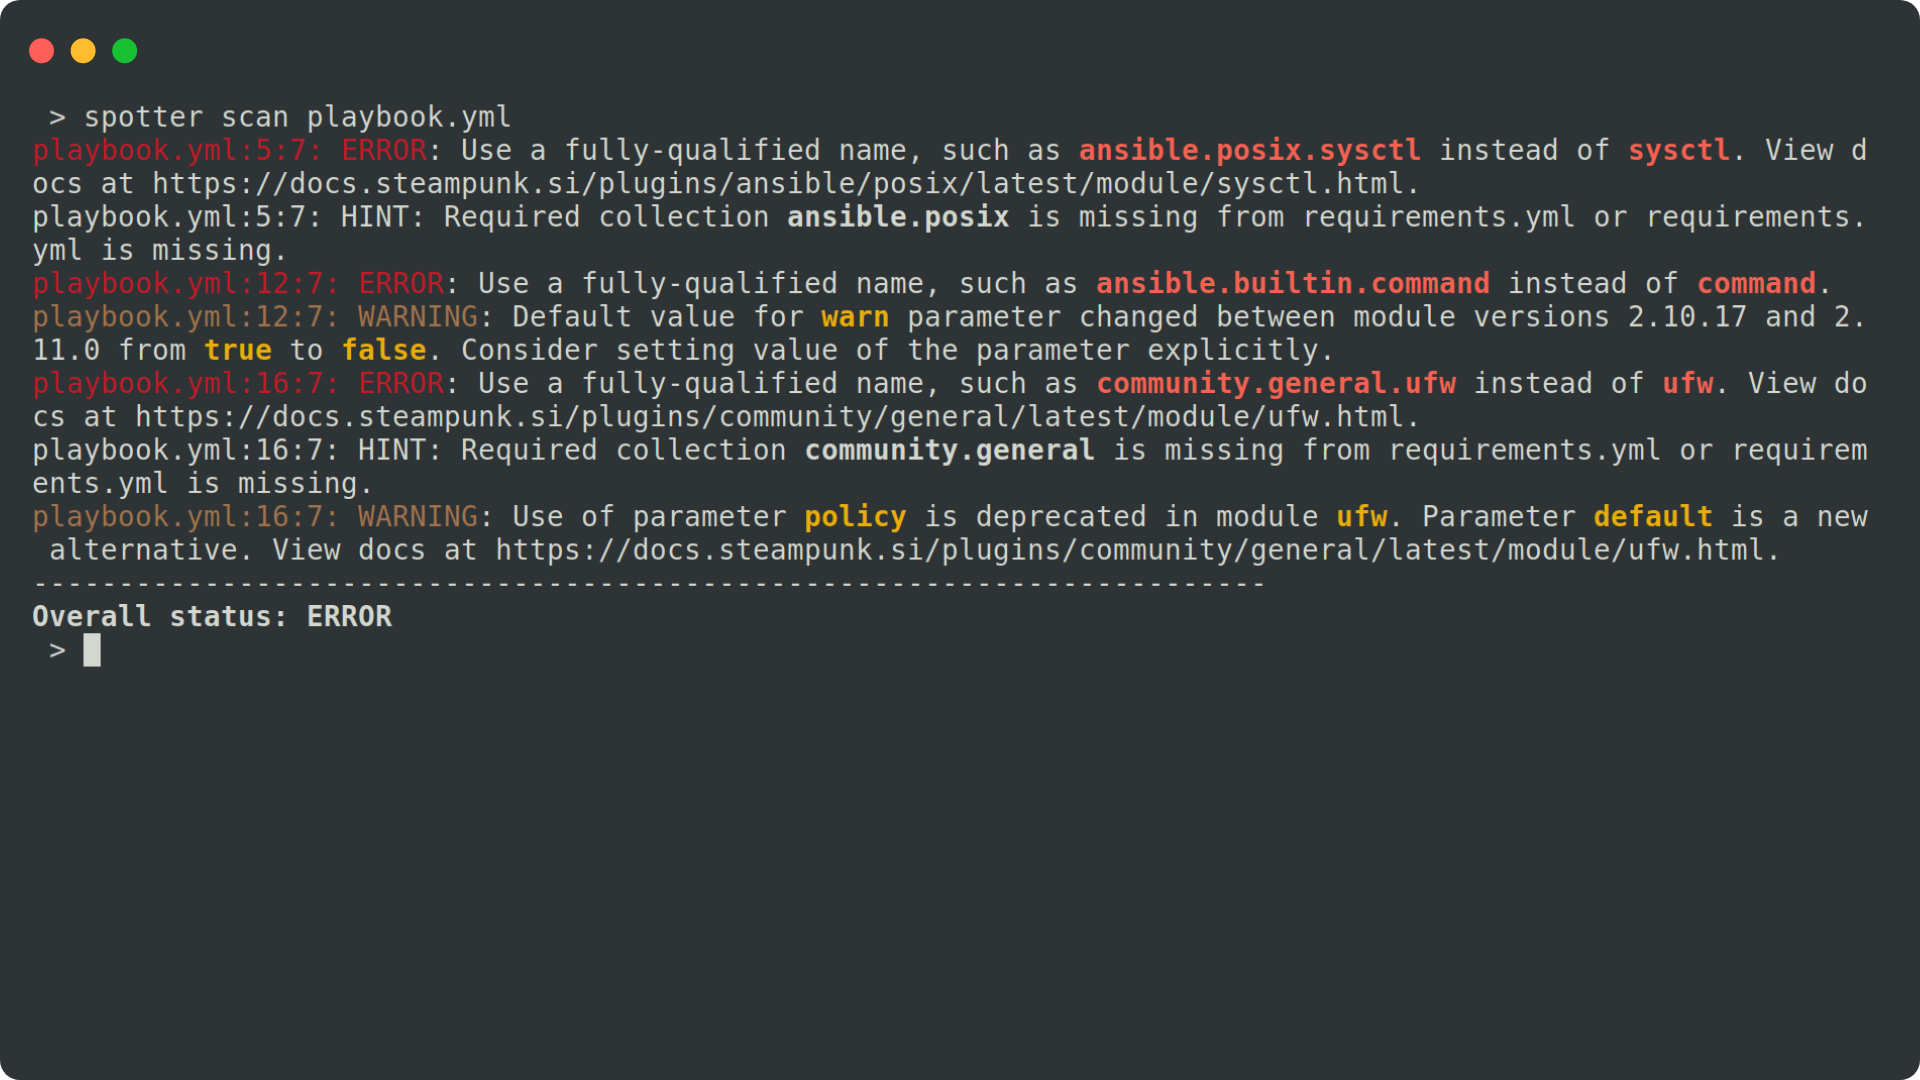
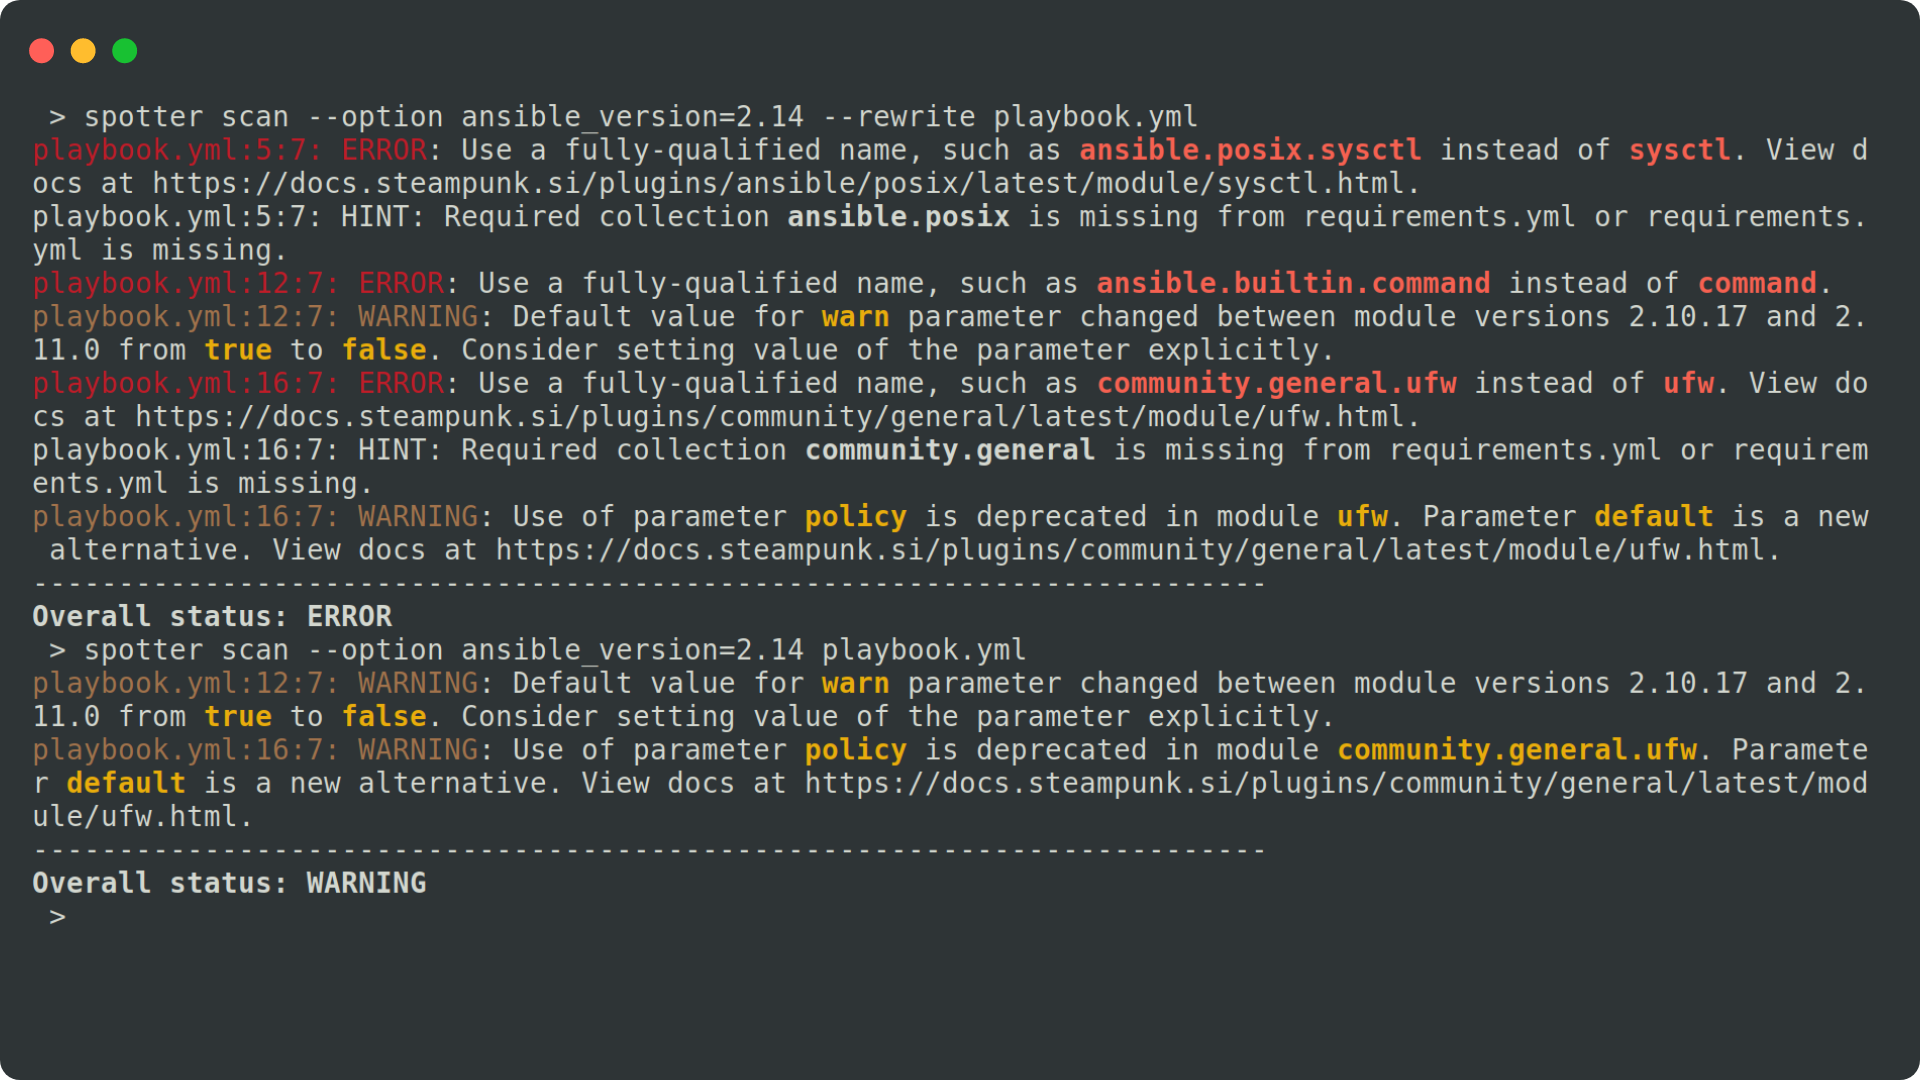
You can even run the tool with a specific Ansible version in mind:
3. Use Certified Ansible content
To make your automation reliable, you should use certified Ansible Collections, because that means the collection has undergone additional quality assessment and testing. More importantly, this guarantees that the collection is maintained and fully supported by Red Hat and partners. Being able to rely on support for Ansible content used in your playbooks makes all the difference when you need help with solving your issues. Spotter can help you with that as well, since you can use it to make sure you are only using certified and approved modules. When Spotter gives you feedback, it also links you directly to the documentation of the module in question.
4. Keep it simple
And lastly, maybe the most important advice, keep it simple! We really mean it. Simple is better when it comes to playbooks. Mainly use Ansible modules and simple tasks, rather than complex blocks and loops that no one can understand and debug. We also recommend that you use Jinja templating and filtering when needed and not too much inline code. When your playbooks are too complex or you have a lot of inline shell and Python commands, think about developing your custom Ansible module. If you’re not interested in doing this yourself, XLAB Steampunk team is specialized to help you write custom modules.
Ready to write a great playbook?
And off you go, writing your playbooks, now equipped with all the key ingredients to help you produce reliable and secure ones. And don’t forget, you can have your own little helper on your journey, Steampunk Spotter, making sure you keep going full steam ahead!


