This post was originally published on the
XLAB Steampunk blog.
This post was originally published on September 29, 2022. The content has been updated to reflect the latest releases.
Steampunk Spotter helps you simplify and accelerate your automation with improved playbooks that guarantee reliable execution. The Steampunk Spotter CLI enables use from the console with the ability to scan Ansible content such as playbooks, roles, collections, or task files.
Let’s get started!
Step 1: Install Steampunk Spotter
To use Steampunk Spotter CLI, you first need to sign up here. By signing up, we avoid unauthenticated requests and reduce the API’s malicious load while making it easily accessible.
Afterward, install the Steampunk Spotter CLI tool. It requires Python 3 and is available as a steampunk-spotter Python package.
Step 2: Authenticate
Spotter supports two kinds of credentials:
Your username and password: spotter --username <username> --password <password> scan playbook.yml
You can use the API token generated in the Spotter App to log in. You can authenticate and proceed further by running the command spotter -t API_TOKEN login
After that, you can start scanning right away!
Step 3: Scan a playbook
Once you have Spotter installed, begin by running the spotter --help command to familiarize yourself with the basic commands available, or look at the README.md.
The core functionality of Spotter CLI lies in its ability to Ansible content to provide valuable feedback and recommendations. The scan command will automatically detect and scan the type of Ansible content.
Use the command spotter scan path/to/file to start a scan.
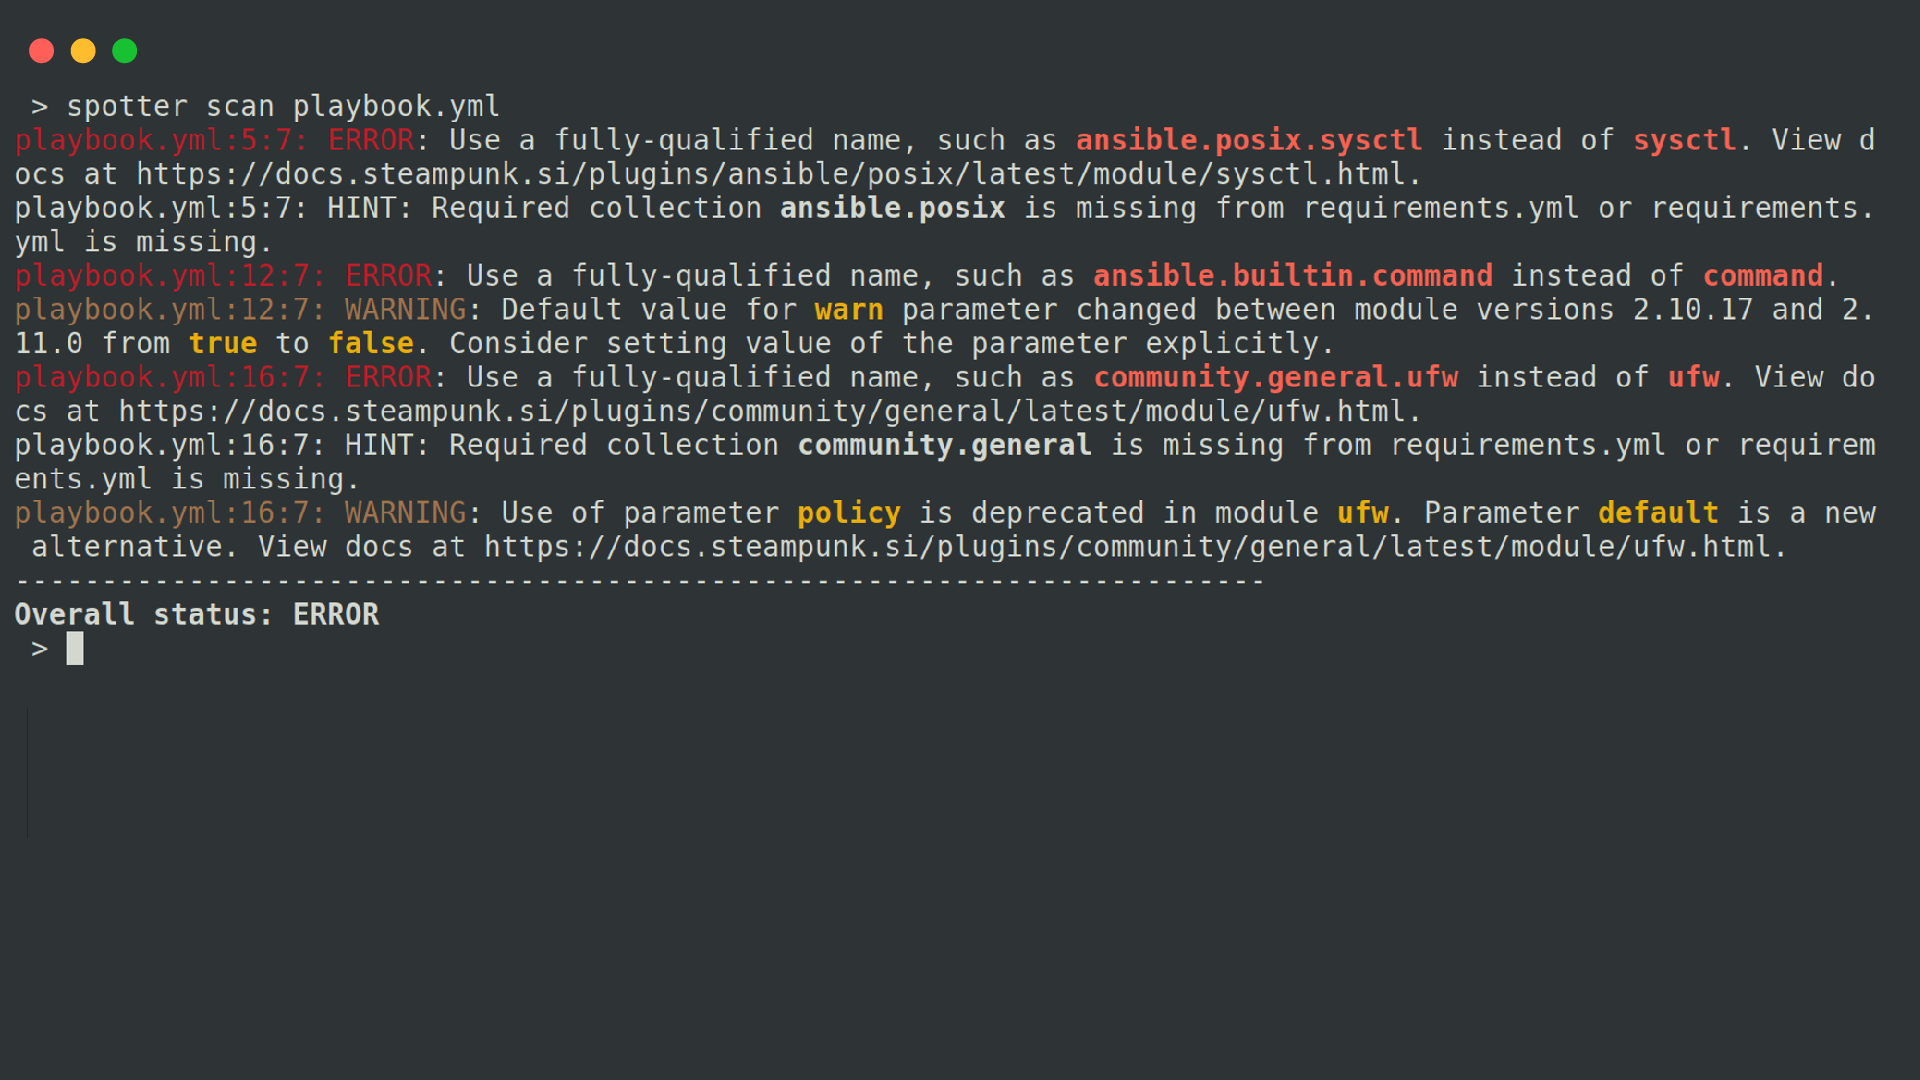
Spotter will analyze your playbooks and offer suggestions for improvement. By adding the --include-values switch to your command, Spotter will also examine parameter values along with their names, modules, and definitions. This way, you can gain more valuable scan reports and discover additional tips for improvement.
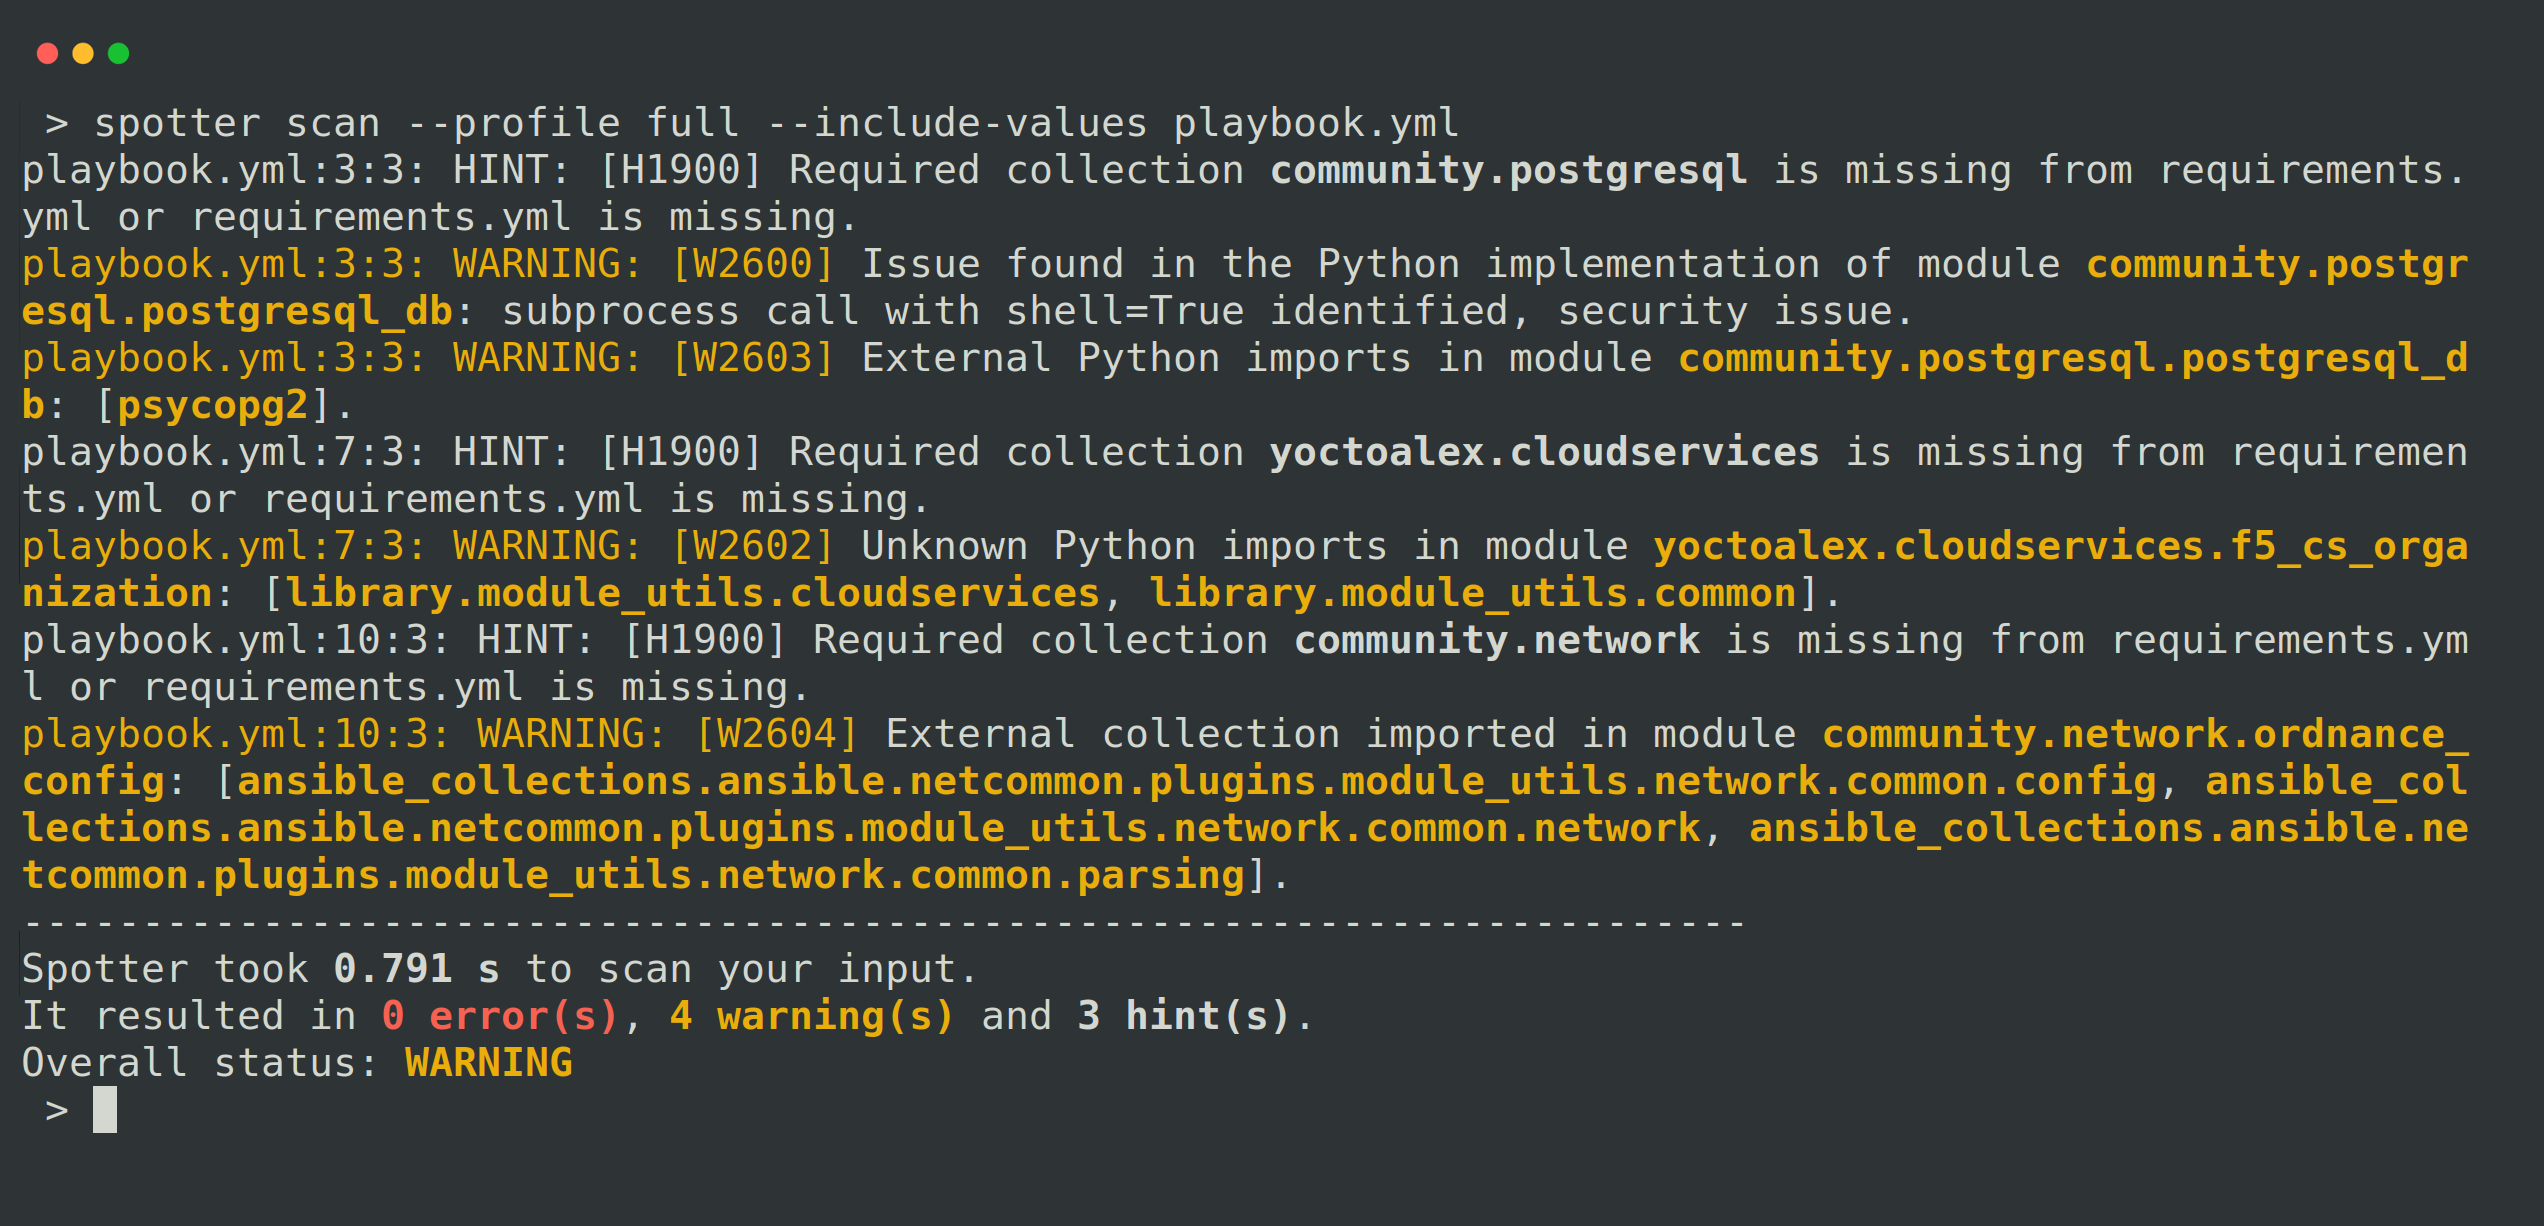
Use Spotter profiles
By default, Spotter employs the “default” profile during scans, giving you essential scan results. It includes best practices, validation, and basic security checks.
However, you can explore other profiles, such as “full” to get in-depth insights and “security” to receive additional recommendations and advice on crafting secure high-quality playbooks. The full profile contains everything the default profile offers, together with upgrade related checks, and advanced security checks.
You need to use the --profile switch to specify the profile you wish to use.
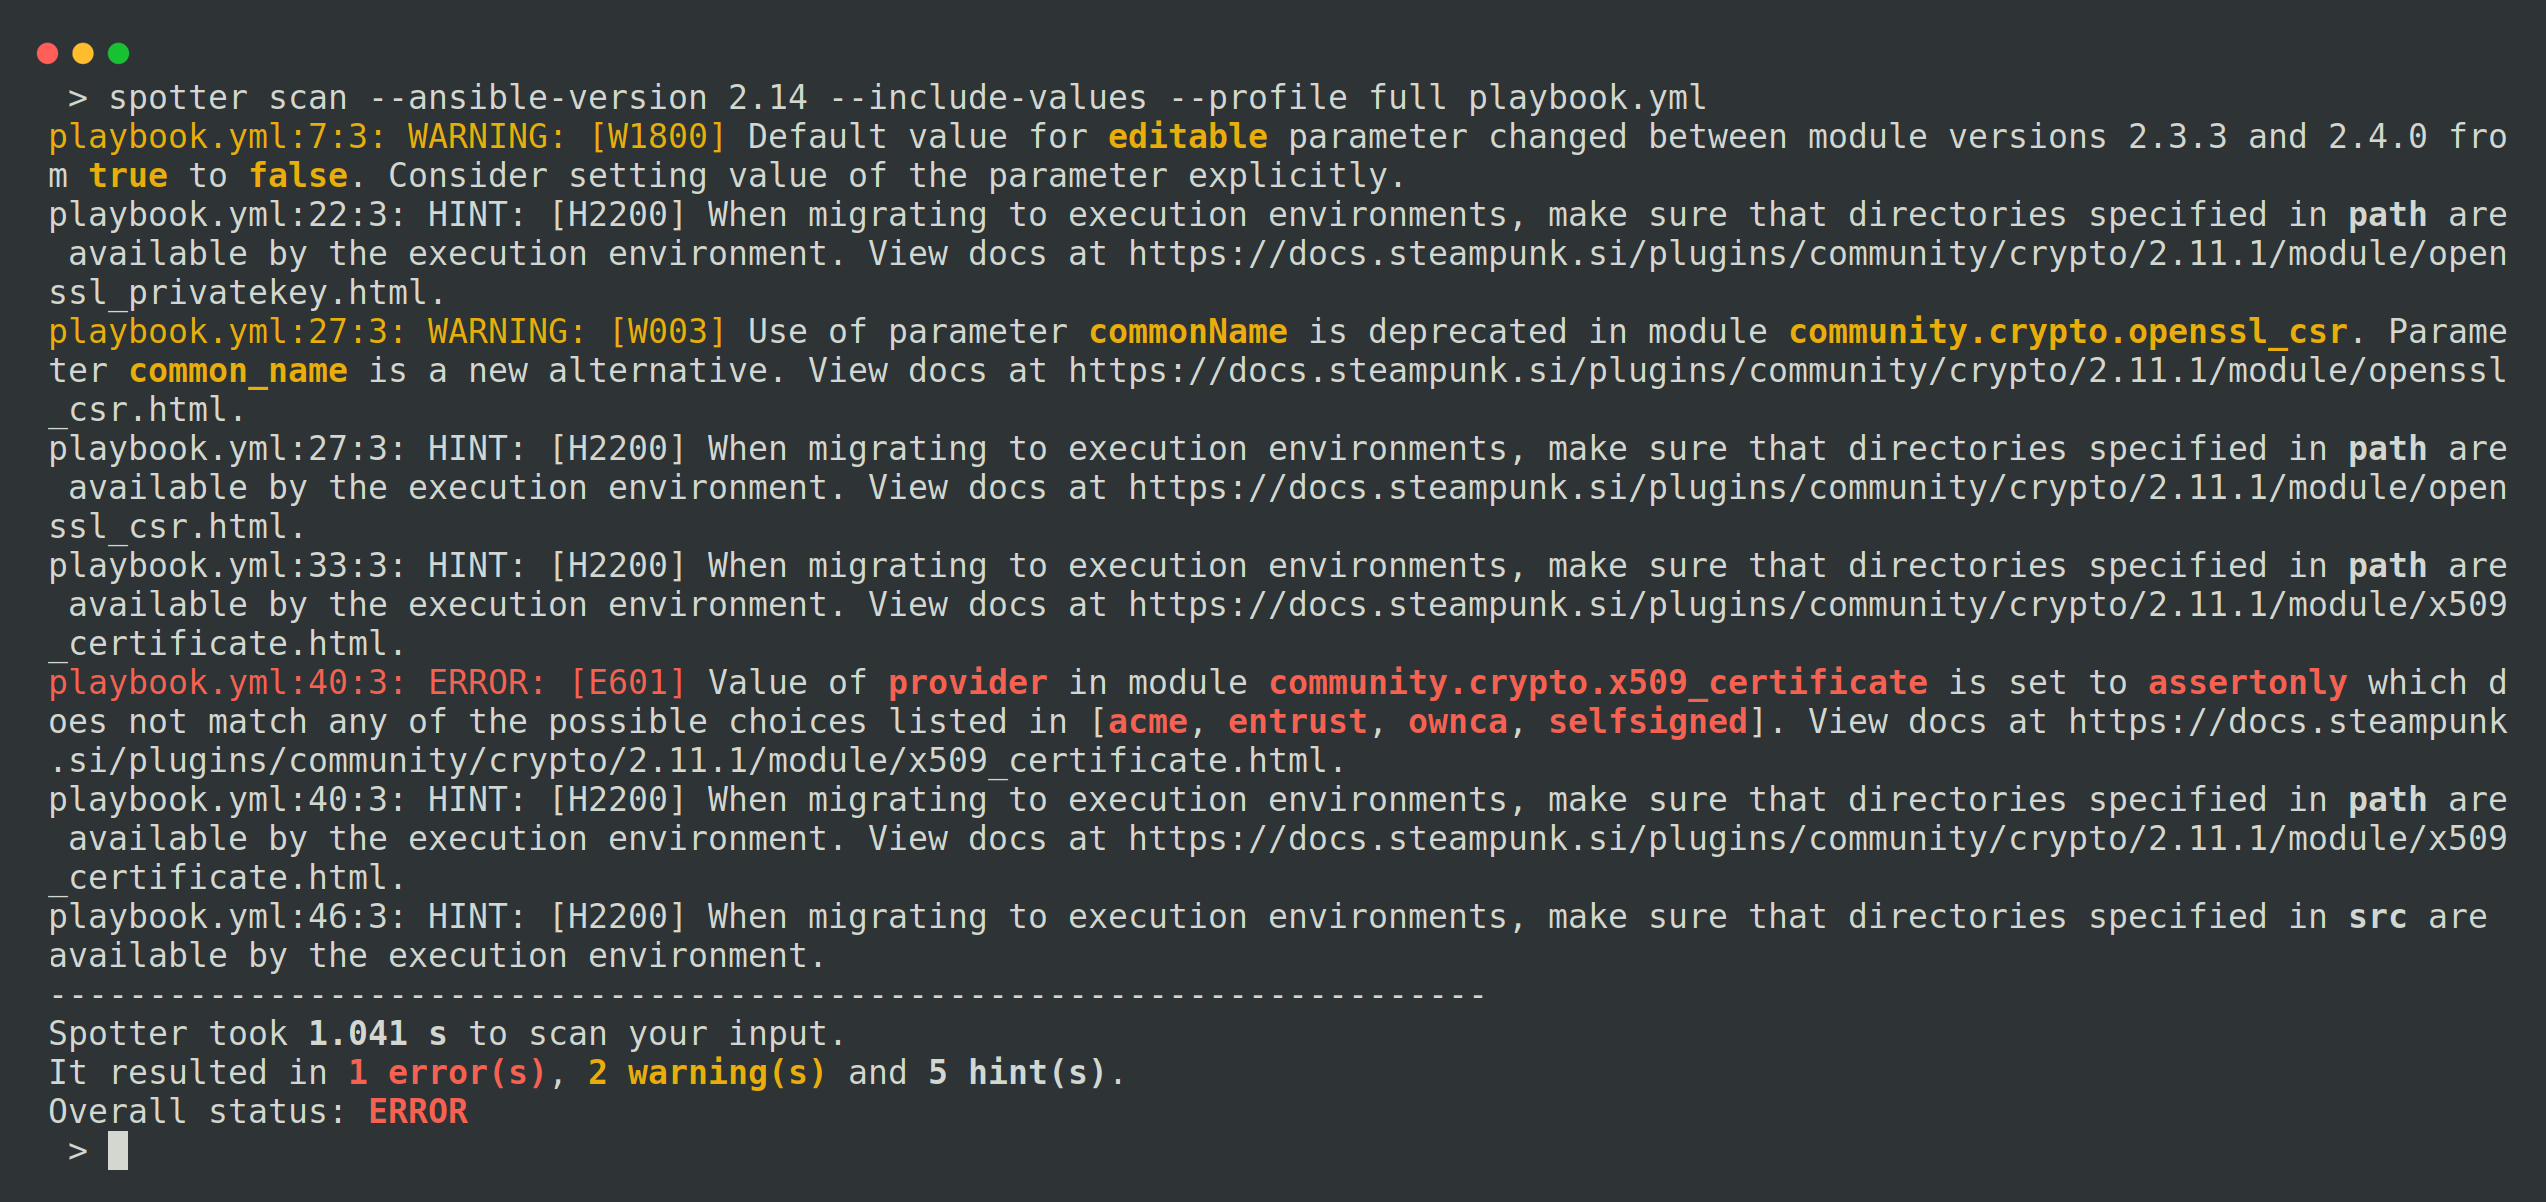
Easily upgrade playbooks
Spotter excels when it comes to upgrades by assessing playbook compatibility with specific Ansible versions and identifying necessary fixes. To determine if your playbook is compatible with a desired Ansible version, simply use the --ansible-version switch and specify the version for Spotter to scan against. To execute the upgrade-related checks, make sure you use the --profile full switch.
You can find out more on this topic in this YT demo or you can read more about it here.
Access Ansible documentation links
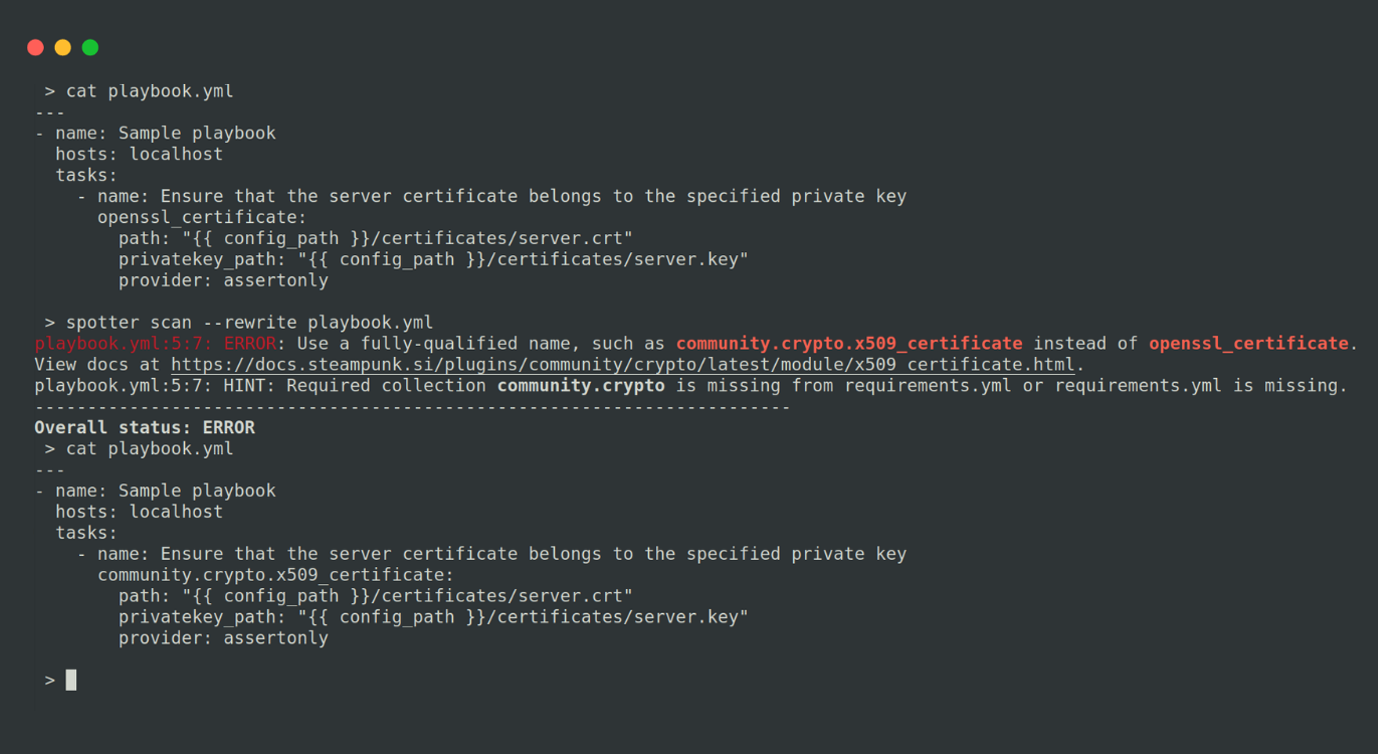
Spotter offers a valuable feature for developers by providing direct links to Ansible Collections and module documentation. When errors are detected, Spotter generates links that allow you to access the relevant Ansible documentation with a single click. This feature saves time and effort, eliminating the need to search for documentation manually.
Fix Ansible content automatically
Spotter’s “rewrite” feature allows for automatically fixing identified playbook errors. It will automatically rewrite your playbook by running the spotter --rewrite switch, resolving the detected issues. This action will also create a requirements file. It’s a convenient way to streamline debugging and improve playbook quality. Check out our YT demo of this feature.
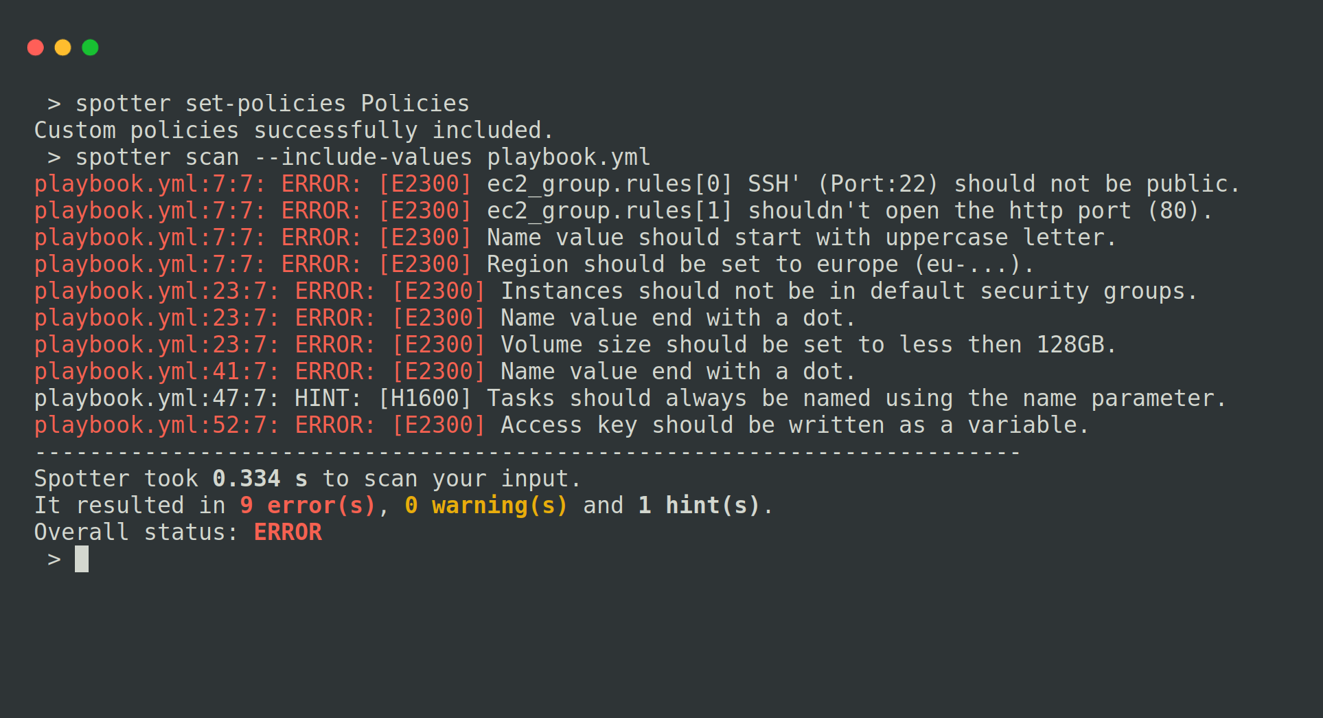
Create custom rules and policies
You can generate custom Spotter checks based on particular policies that you or your clients employ. Our system is compatible with policies written in accordance with the Open Policy Agent (OPA) engine, in Rego language. You can effortlessly define permitted modules and collections, establish specific naming conventions, and limit required values on specific modules and entities, such as exposed ports and virtual machine sizes. You can set or clear the policies by using the set-policies command, and clear-policies command. (Custom rules are available as an enterprise feature.)
You can watch our YT tutorial on this topic or read more about it here.
Take a look at our Spotter 101 YouTube tutorial, guiding you through the process of using Spotter via the CLI:
Upgrade your playbook scanning experience with our Spotter App
CLI isn’t the only option for scanning your playbooks. Creating a Steampunk Spotter account allows you to scan playbooks within the Spotter integrations like GitHub and GitLab CI/CD workflows, the Visual Studio Code extension, or you can use the Spotter App. No matter where you scan your Ansible content, the app allows you to see scan analytics and trends in the web interface, all in one place.